

Do you have a crayon storage system in your classroom? I don’t know about your classroom, but I’ve always found crayons cause a lot of trouble! Someone broke their blue crayon, someone lost their red, all the yellows disappeared from table one, etc. Then magically at the end of the day, all those crayons end up on the floor!
One way I’ve found to combat the crayon complication is to have a central location where all the extra crayons are stored.
Creating Your Storage Solution
Materials
Two 3-Drawer Containers
Crayons
Scissors
Box Tape or Velcro
Crayon Storage Labels
Step 1 – Print the Crayon Storage Labels
You can make your own labels easily in PowerPoint (or another software of your choosing). However, you might have to fiddle around with the sizing to get it just right. If you opt to use the mini three-drawer containers, you can grab free storage labels here! These have been created to fit those drawers perfectly.
Step 2 – Prepare the Crayon Storage Labels
If you’re planning on making this a long-term storage solution in your classroom, I would highly recommend laminating your labels. This is an extra step, but it increases durability and therefore the longevity of the labels. Then of course you will need to cut the labels.
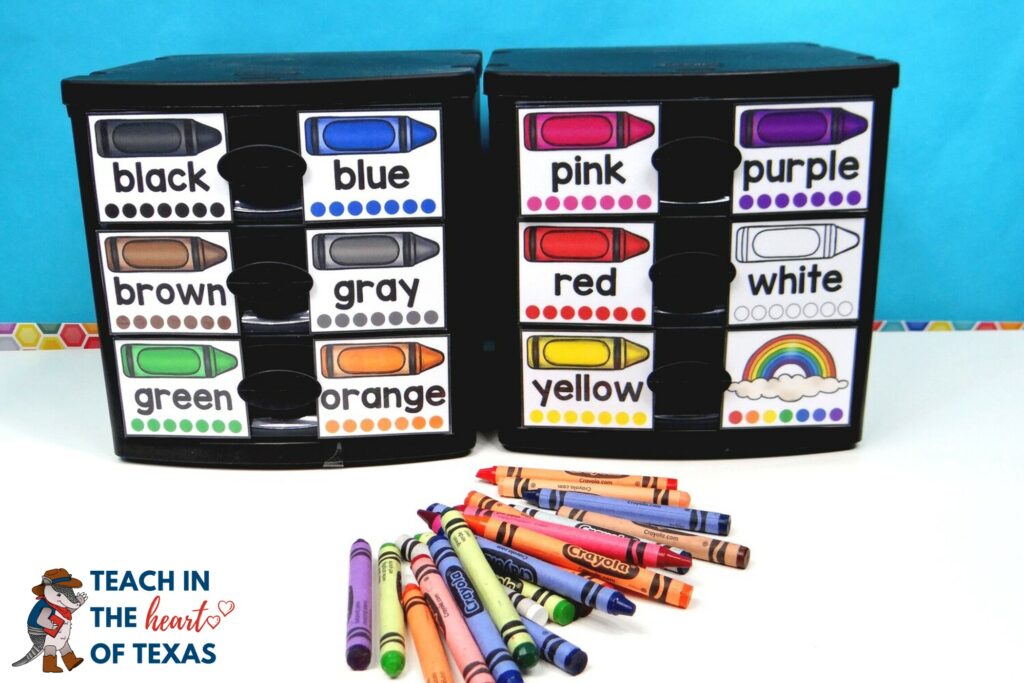
Step 3 – Choose Label Order
Next, you’ll want to decide on the order of your labels. Typically I like to put colors in rainbow order, but for this project, I prefer to put the colors in alphabetical order. Remember you’ll have gray, black, brown, white, and skin tone colors to account for so rainbow order would be more difficult for those color choices.
Step 4 – Label the Drawers
Pull out each drawer and attach the labels one at a time. I like to loop the box tape and put it on the back of the label. If you don’t laminate the label cards, I would highly suggest placing the box tape on top of the label. Simply cover the label with tape and attach the excess tape to the bottom of the drawer.
You could also try using hot glue to attach the labels.
Alternatively, if you are a Cricut user, I would imagine you could skip the labels altogether and make some cute vinyl stickers to add to your drawers.
Step 5 – Organize the Crayons
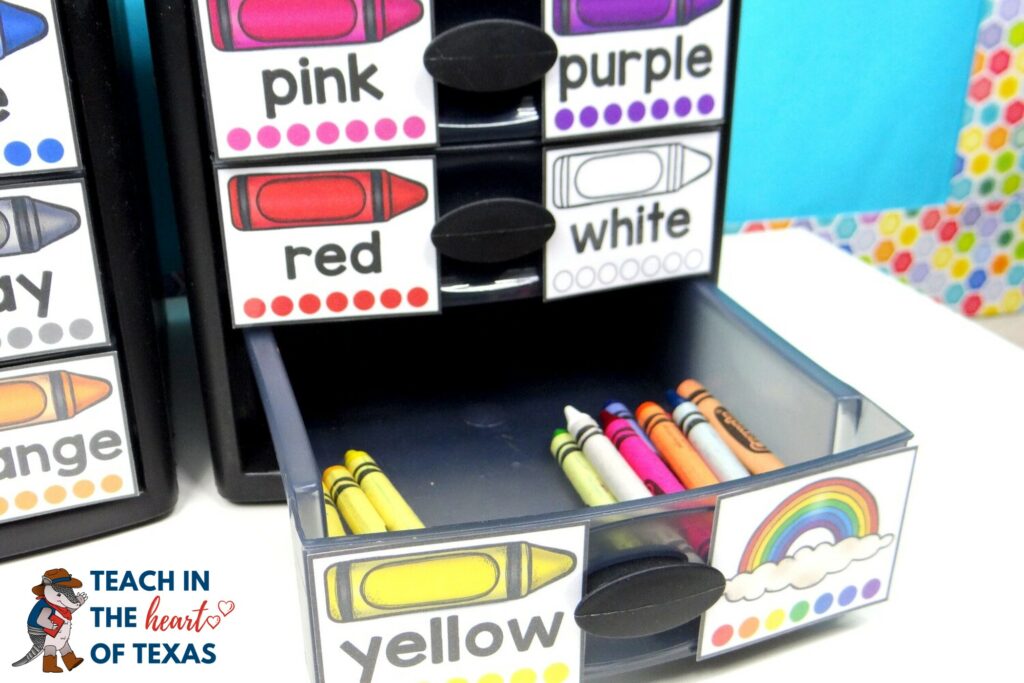
Finally, you’ll need to sort the crayons into the appropriate drawers. Obviously, the color labels are self-explanatory. I have used the rainbow label in two ways with my students.
- The rainbow label can be used to signify any color that is not represented in another drawer such as apricot, green-yellow, blue-violet, etc.
- Instead of students sorting the crayons throughout the day, you can have your students place any random crayons they may find during the day in the rainbow drawer. An appointed student can use extra time during their day to sort through the crayons their peers find.
Now unless you’re prepping this project during the summer before your first year of teaching, you likely already have a mess of crayons to contend with. Rather than spending all your time sorting and organizing the crayons, let your students help you out!
You could make it a whole group activity by giving each group of students a bucket of crayons to sort. Then you can take all those individual piles and add them to the drawers. Or you could let some of your students work on sorting the crayons as an early finishers activity.
Hopefully, this system will help keep your crayons under control this year!
Creation Castle
Heather is the author of Creation Castle. She has experience with general education, special education, and ESL students in kindergarten through fifth grade. She specializes in early elementary math and literacy, as well as organization.