Before we get into any details about how to create your center rotation chart, I want to preface this post by saying there are several ways to create and implement a center rotation system.
If you don’t think this system will work for you, don’t feel like you need to settle on it just because you can grab my chart pieces for free. Maybe a center rotation wheel or digital center rotation chart will better suit your needs. Okay, let’s get down to business!
Quick Links
This center rotation chart was designed to go along with my City Centers System. You don’t have to use my centers to use this chart, but you’ll have to create your own center cards.
To use this chart, you’ll need to assign your students to two different groups – one for math and one for literacy. Your two grouping options are by vehicle and by color. (This is because it is highly unlikely your students will be working with the same group of kids for both center times).
Materials You’ll Need for This Center Rotation Chart
As I always state in my posts, these materials are recommendations, but if you have something else that will work just as well, don’t feel like you need to go out and spend a bunch of money on supplies.
- Pocket Charts or Designated Wall Space
- Cardstock
- Lamination
- Color Ink
- Center Location Cards (free download)
- Student Cards (free download)
Creating Your Student Center Rotation Cards
My student rotation cards are a little different than others you might be used to because they serve a dual purpose. Each student card has a vehicle and a color. The vehicle represents math centers and the color represents literacy centers (or vice versa).
That means you need to know your groupings for math and literacy centers before you can make the student cards. You can use these FREE planning sheets to group your students.
With your planning sheets, you’ll also see a few quick reference pages for you to record the color and vehicle for your students in one spot to help you make your student cards.
Four Options for Posting Your Center Rotation Chart
Once you’ve planned your groups, you’re ready to put your chart in action. My favorite way to use a center rotation chart is with a pocket chart because you can easily move the cards around throughout the week.
As we look at each option, I’ll let you know where two students will be during their centers to help you understand how the different versions work.
Option 1
The first way you can use the center rotation chart is probably how you’ve seen it in other classrooms. You post the center type (or in this location) as column or row headers and then place student cards in the appropriate place.
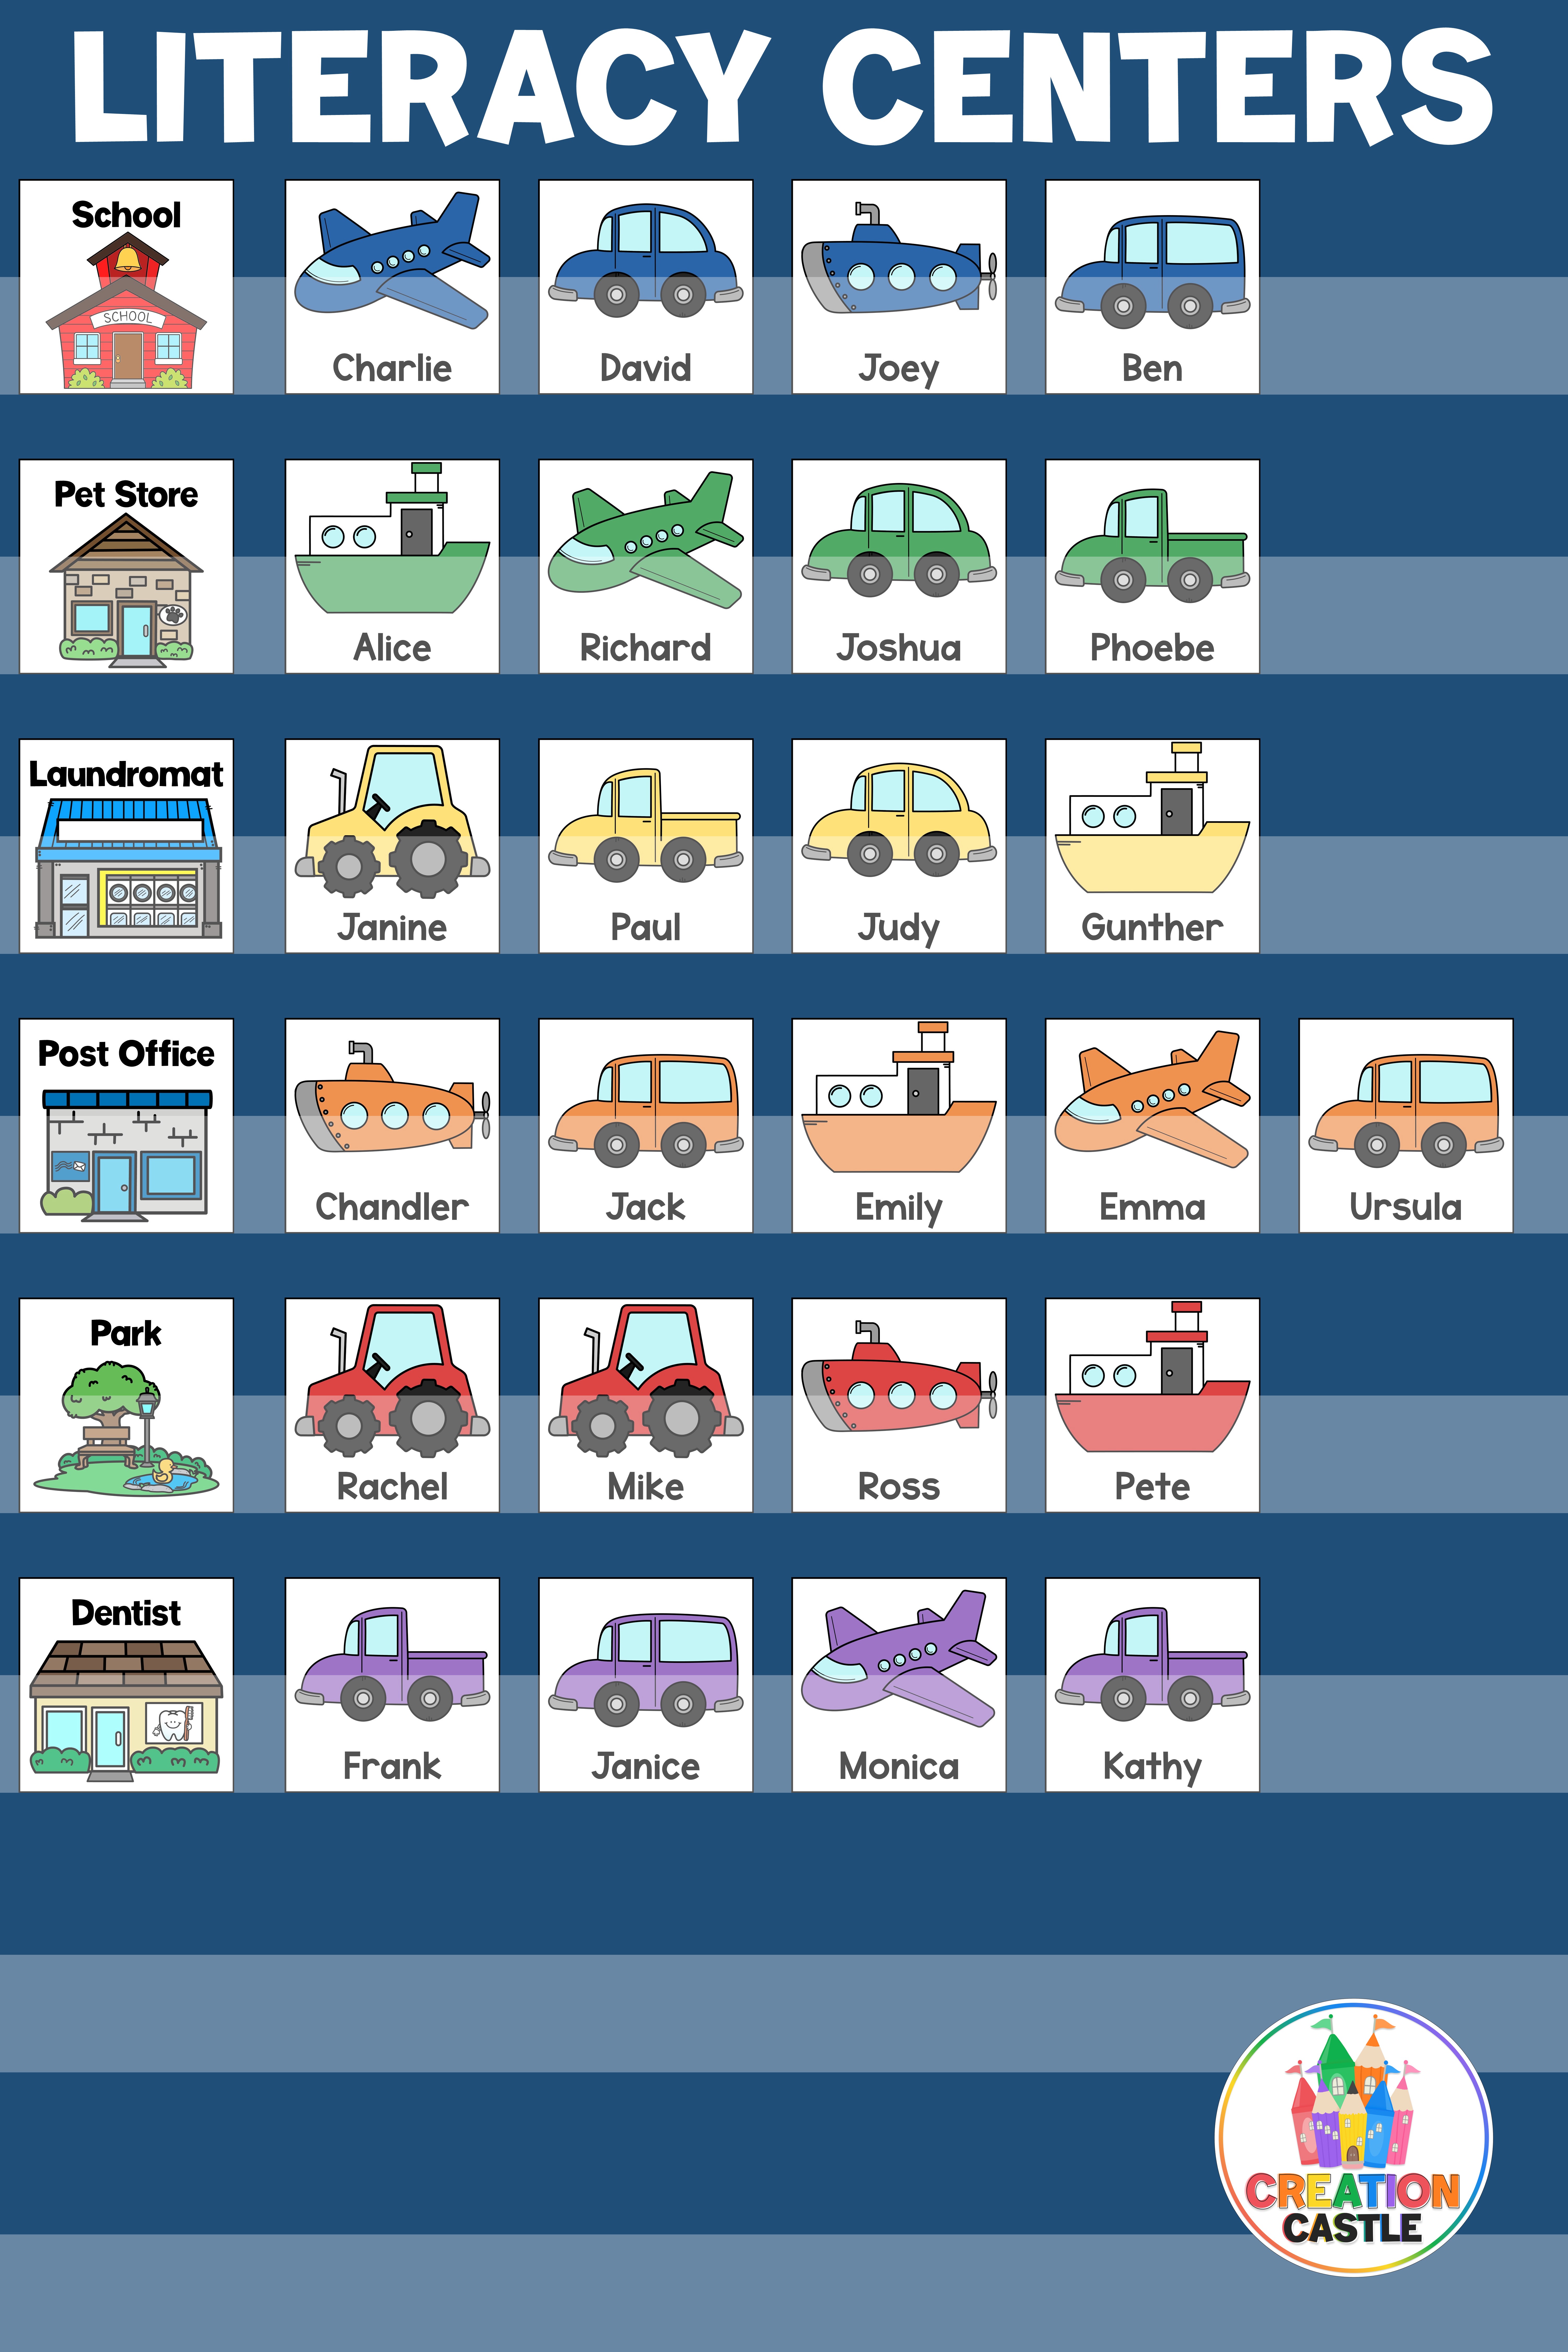
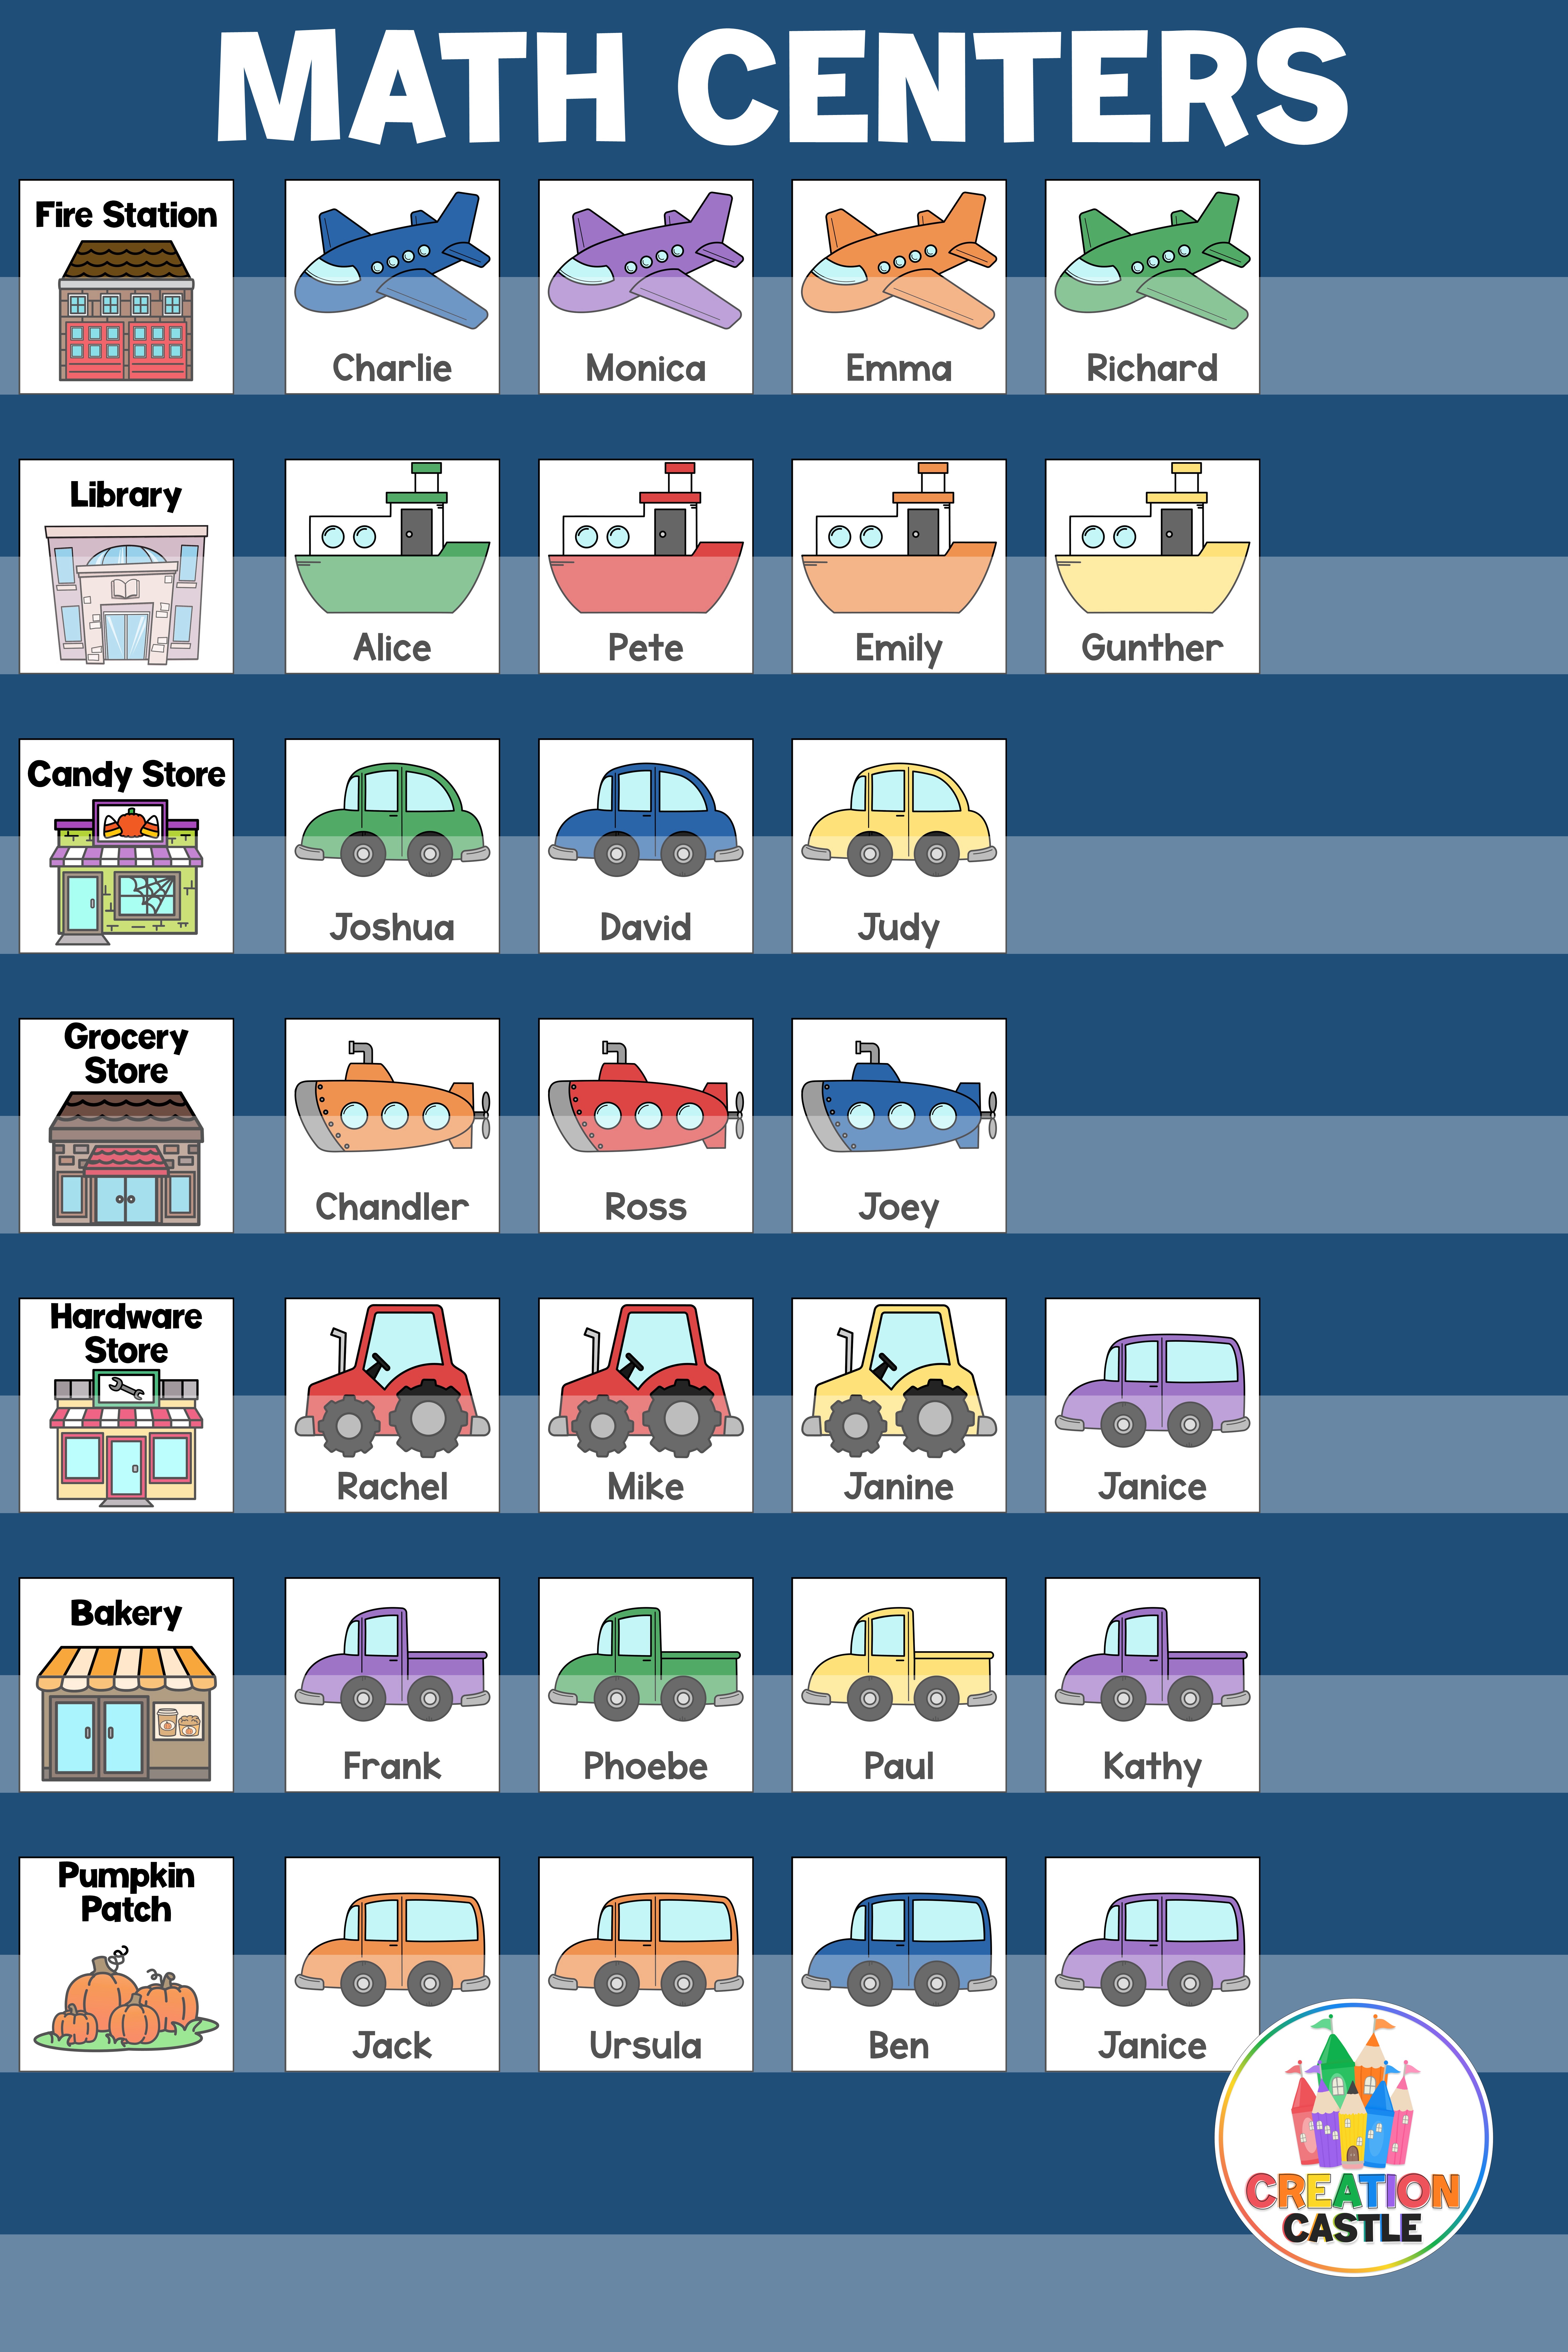
Let’s look at our example students:
Joey will be going to the school for literacy centers and the grocery store for math centers.
Chandler will be going to the post office for literacy centers and the grocery store for math centers.Because Joey and Chander are both in the submarine math group, they will attend that center together. However they are in different color groups for literacy centers, so they will be in separate centers at that time.
With this option, you’ll need a chart for math centers and one for literacy centers. If you only have room for one chart, you’ll need to swap out your cards during the day.
Option 2
This option only works if your students are going to one or two centers per day… or you have a giant pocket chart! You could set up your pocket chart so that students can see where they are going for both math and literacy centers each day. It might look something like this.
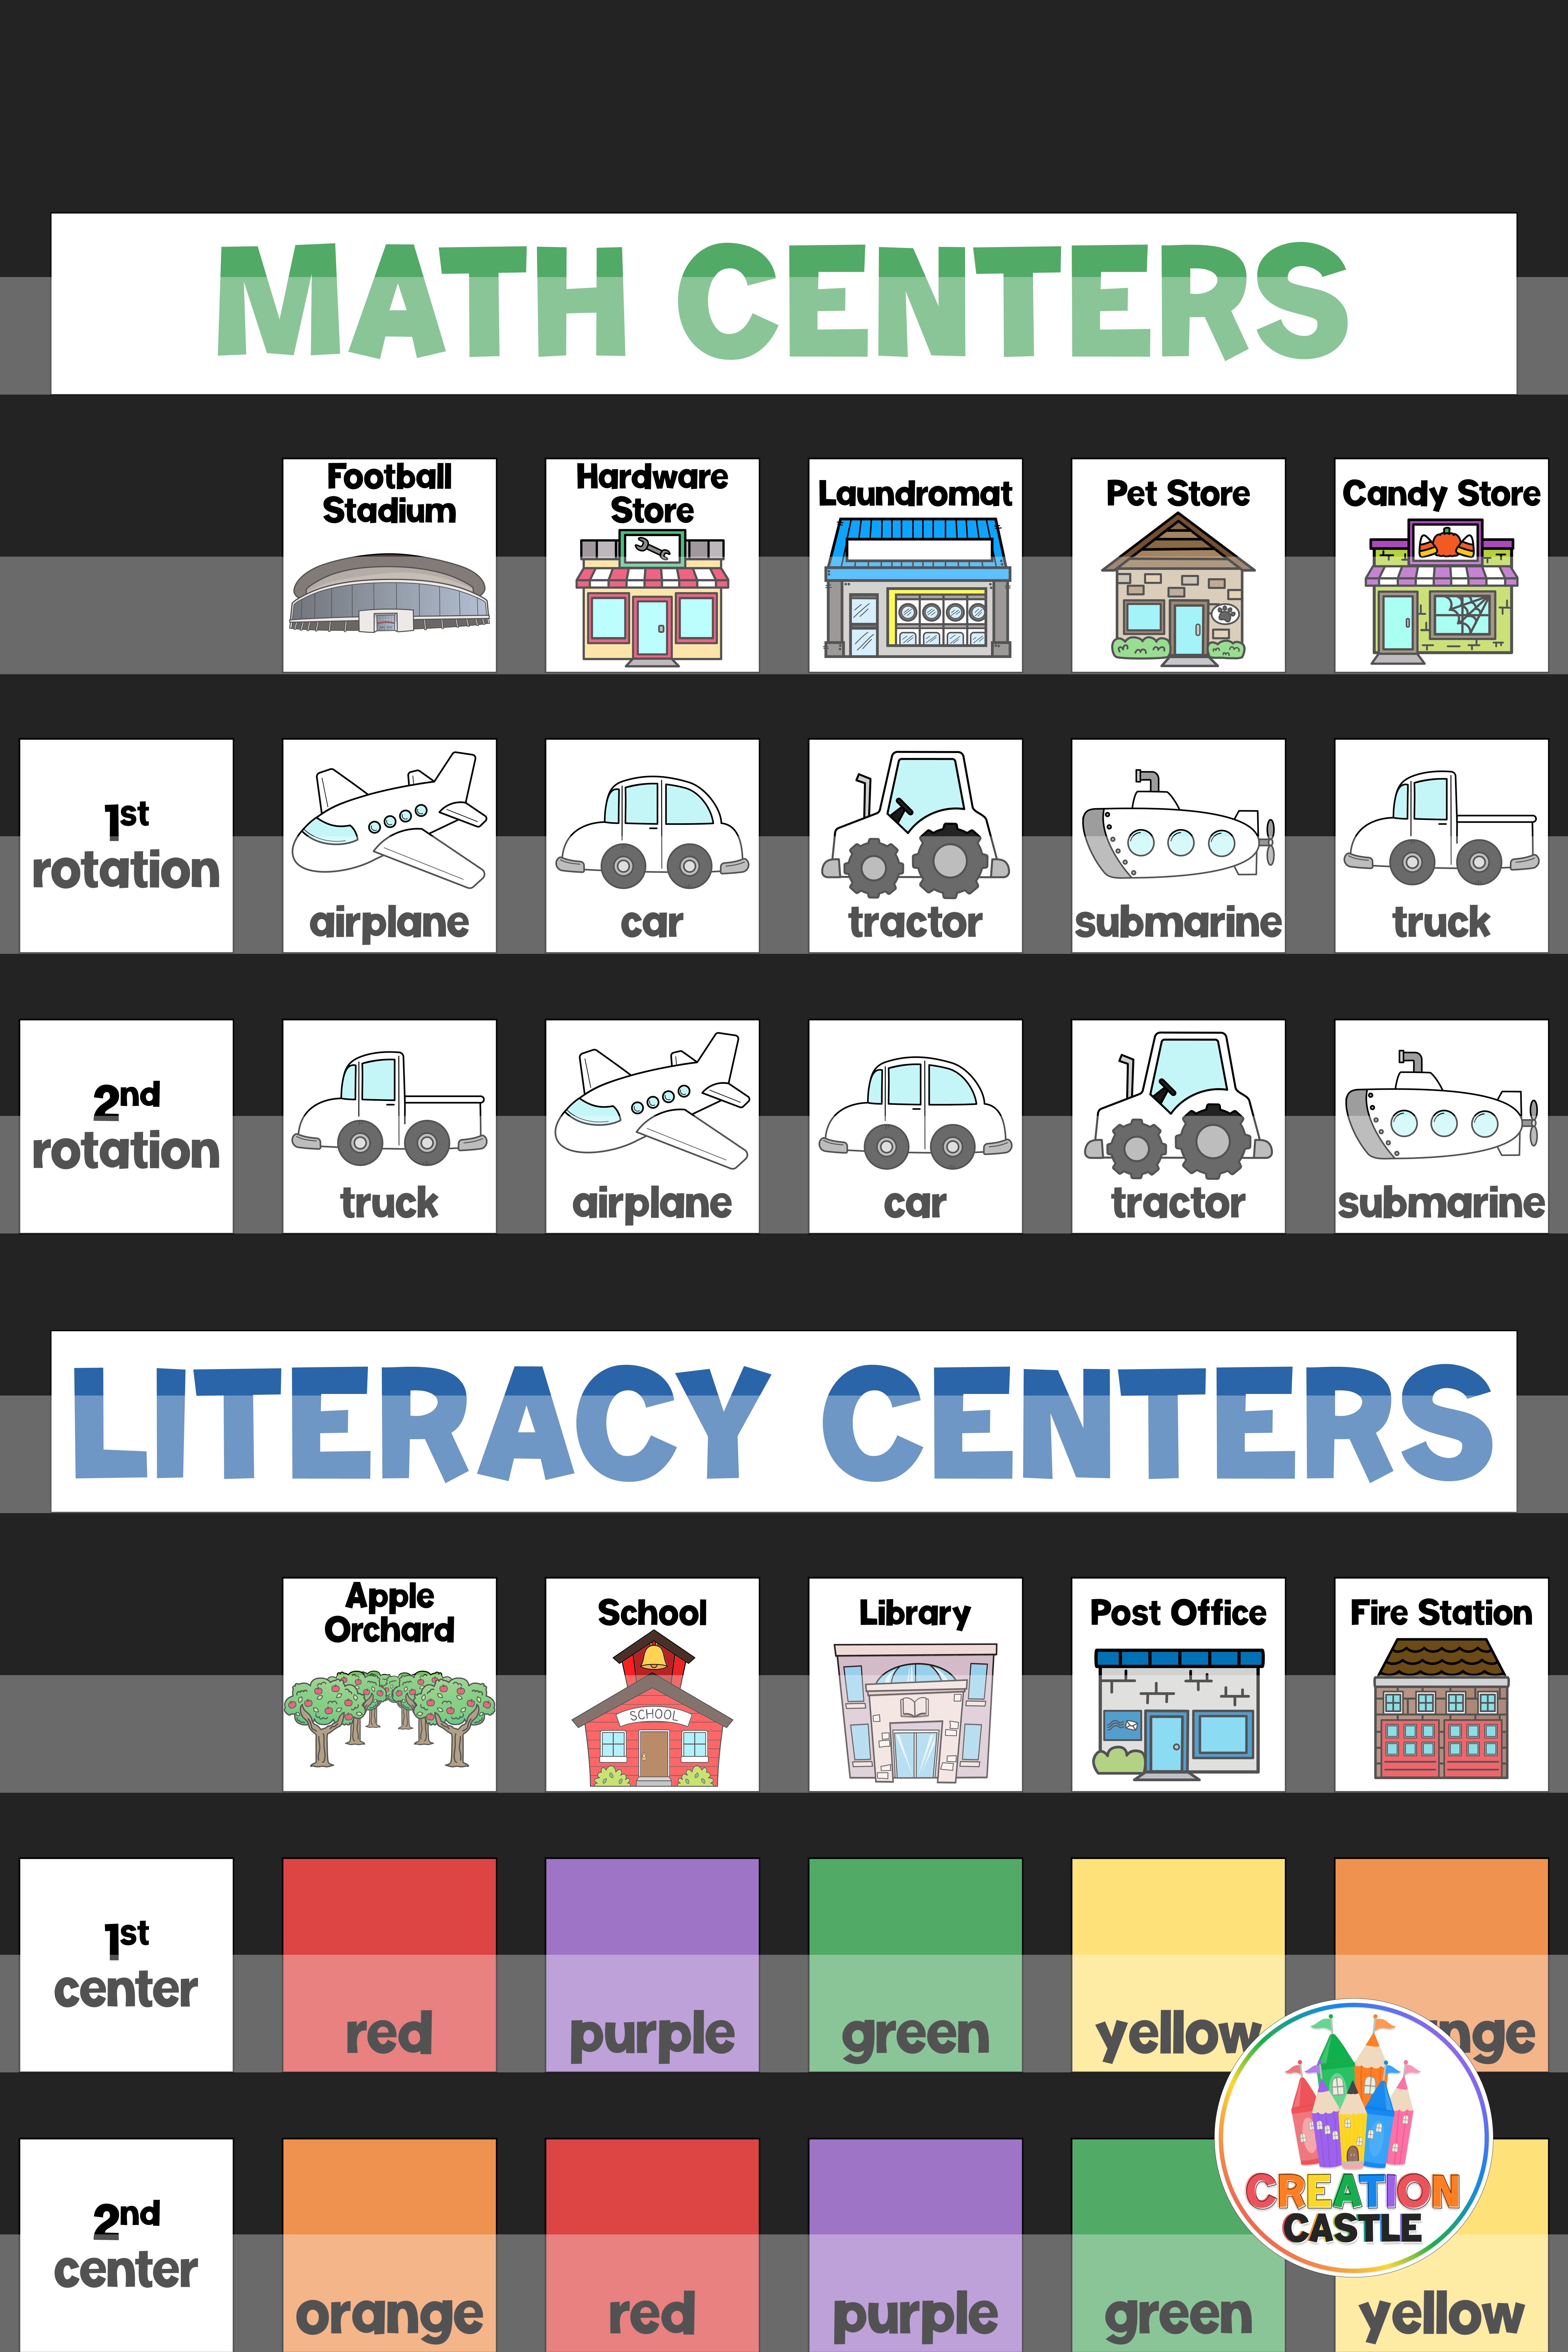
Let’s look at our example students:
Emma is in the airplane and orange groups. First, she will be going to the fire station for literacy centers. Then she will go to the apple orchard. For math centers, she will begin at the football stadium and then go to the hardware store.
Ross is in the submarine and red groups. He will start literacy centers at the apple orchard and then go to the school. For math centers, he will go to the pet store and then to the candy store.Emma and Ross are not in the same color or vehicle group, so they will not attend any of the same centers.
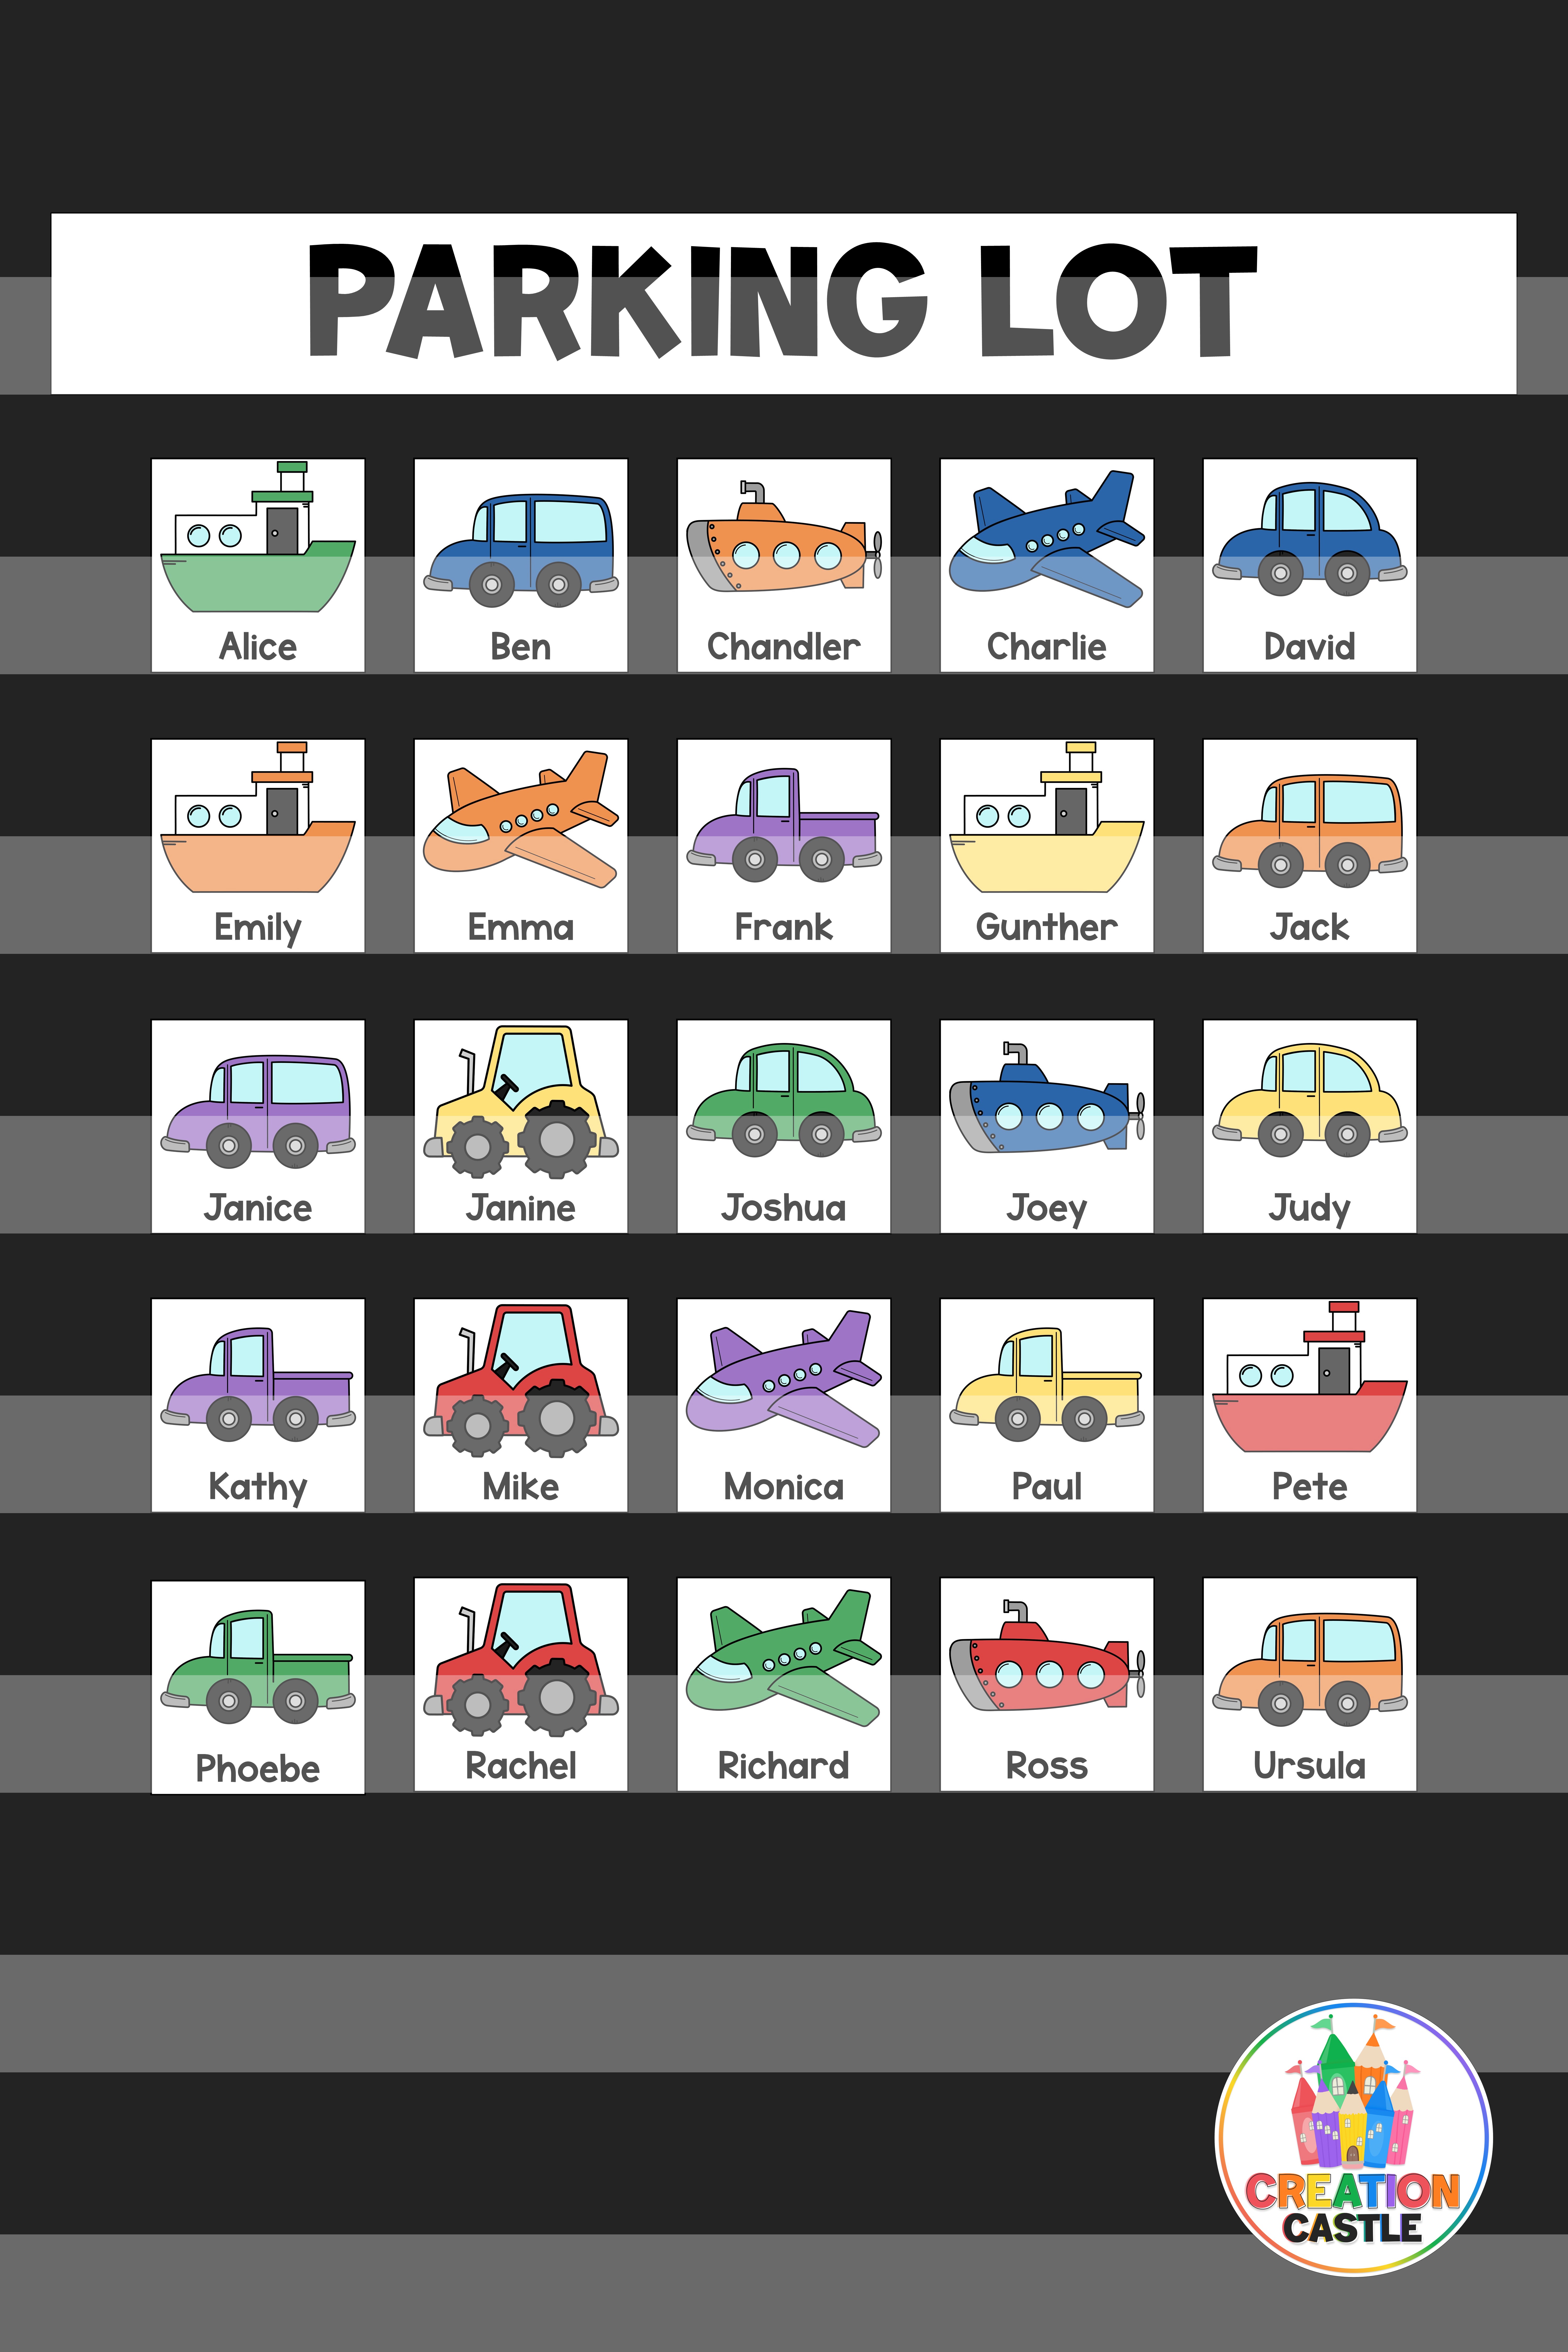
As you can see, you’ll also need to keep the student cards separate for this method. You could either have students keep their card that shows their vehicle and color with them or have a “parking lot” where students can reference their cards.
To be honest, this method takes the least amount of time during the week but is also probably not as functional if you want your students to do several rotations per day.
Option 3
My favorite way to display a center rotation chart is one that can pull double duty for math and literacy centers. You’ll be able to display more rotations or groups this way, but it can be a little tricky for kids to get used to.
For this method, you’ll display a color and vehicle combination card for each rotation. You’ll still need a solution like the “parking lot” for this display option. This is a little more complicated, especially for young learners. I would not recommend this for the beginning of the year.

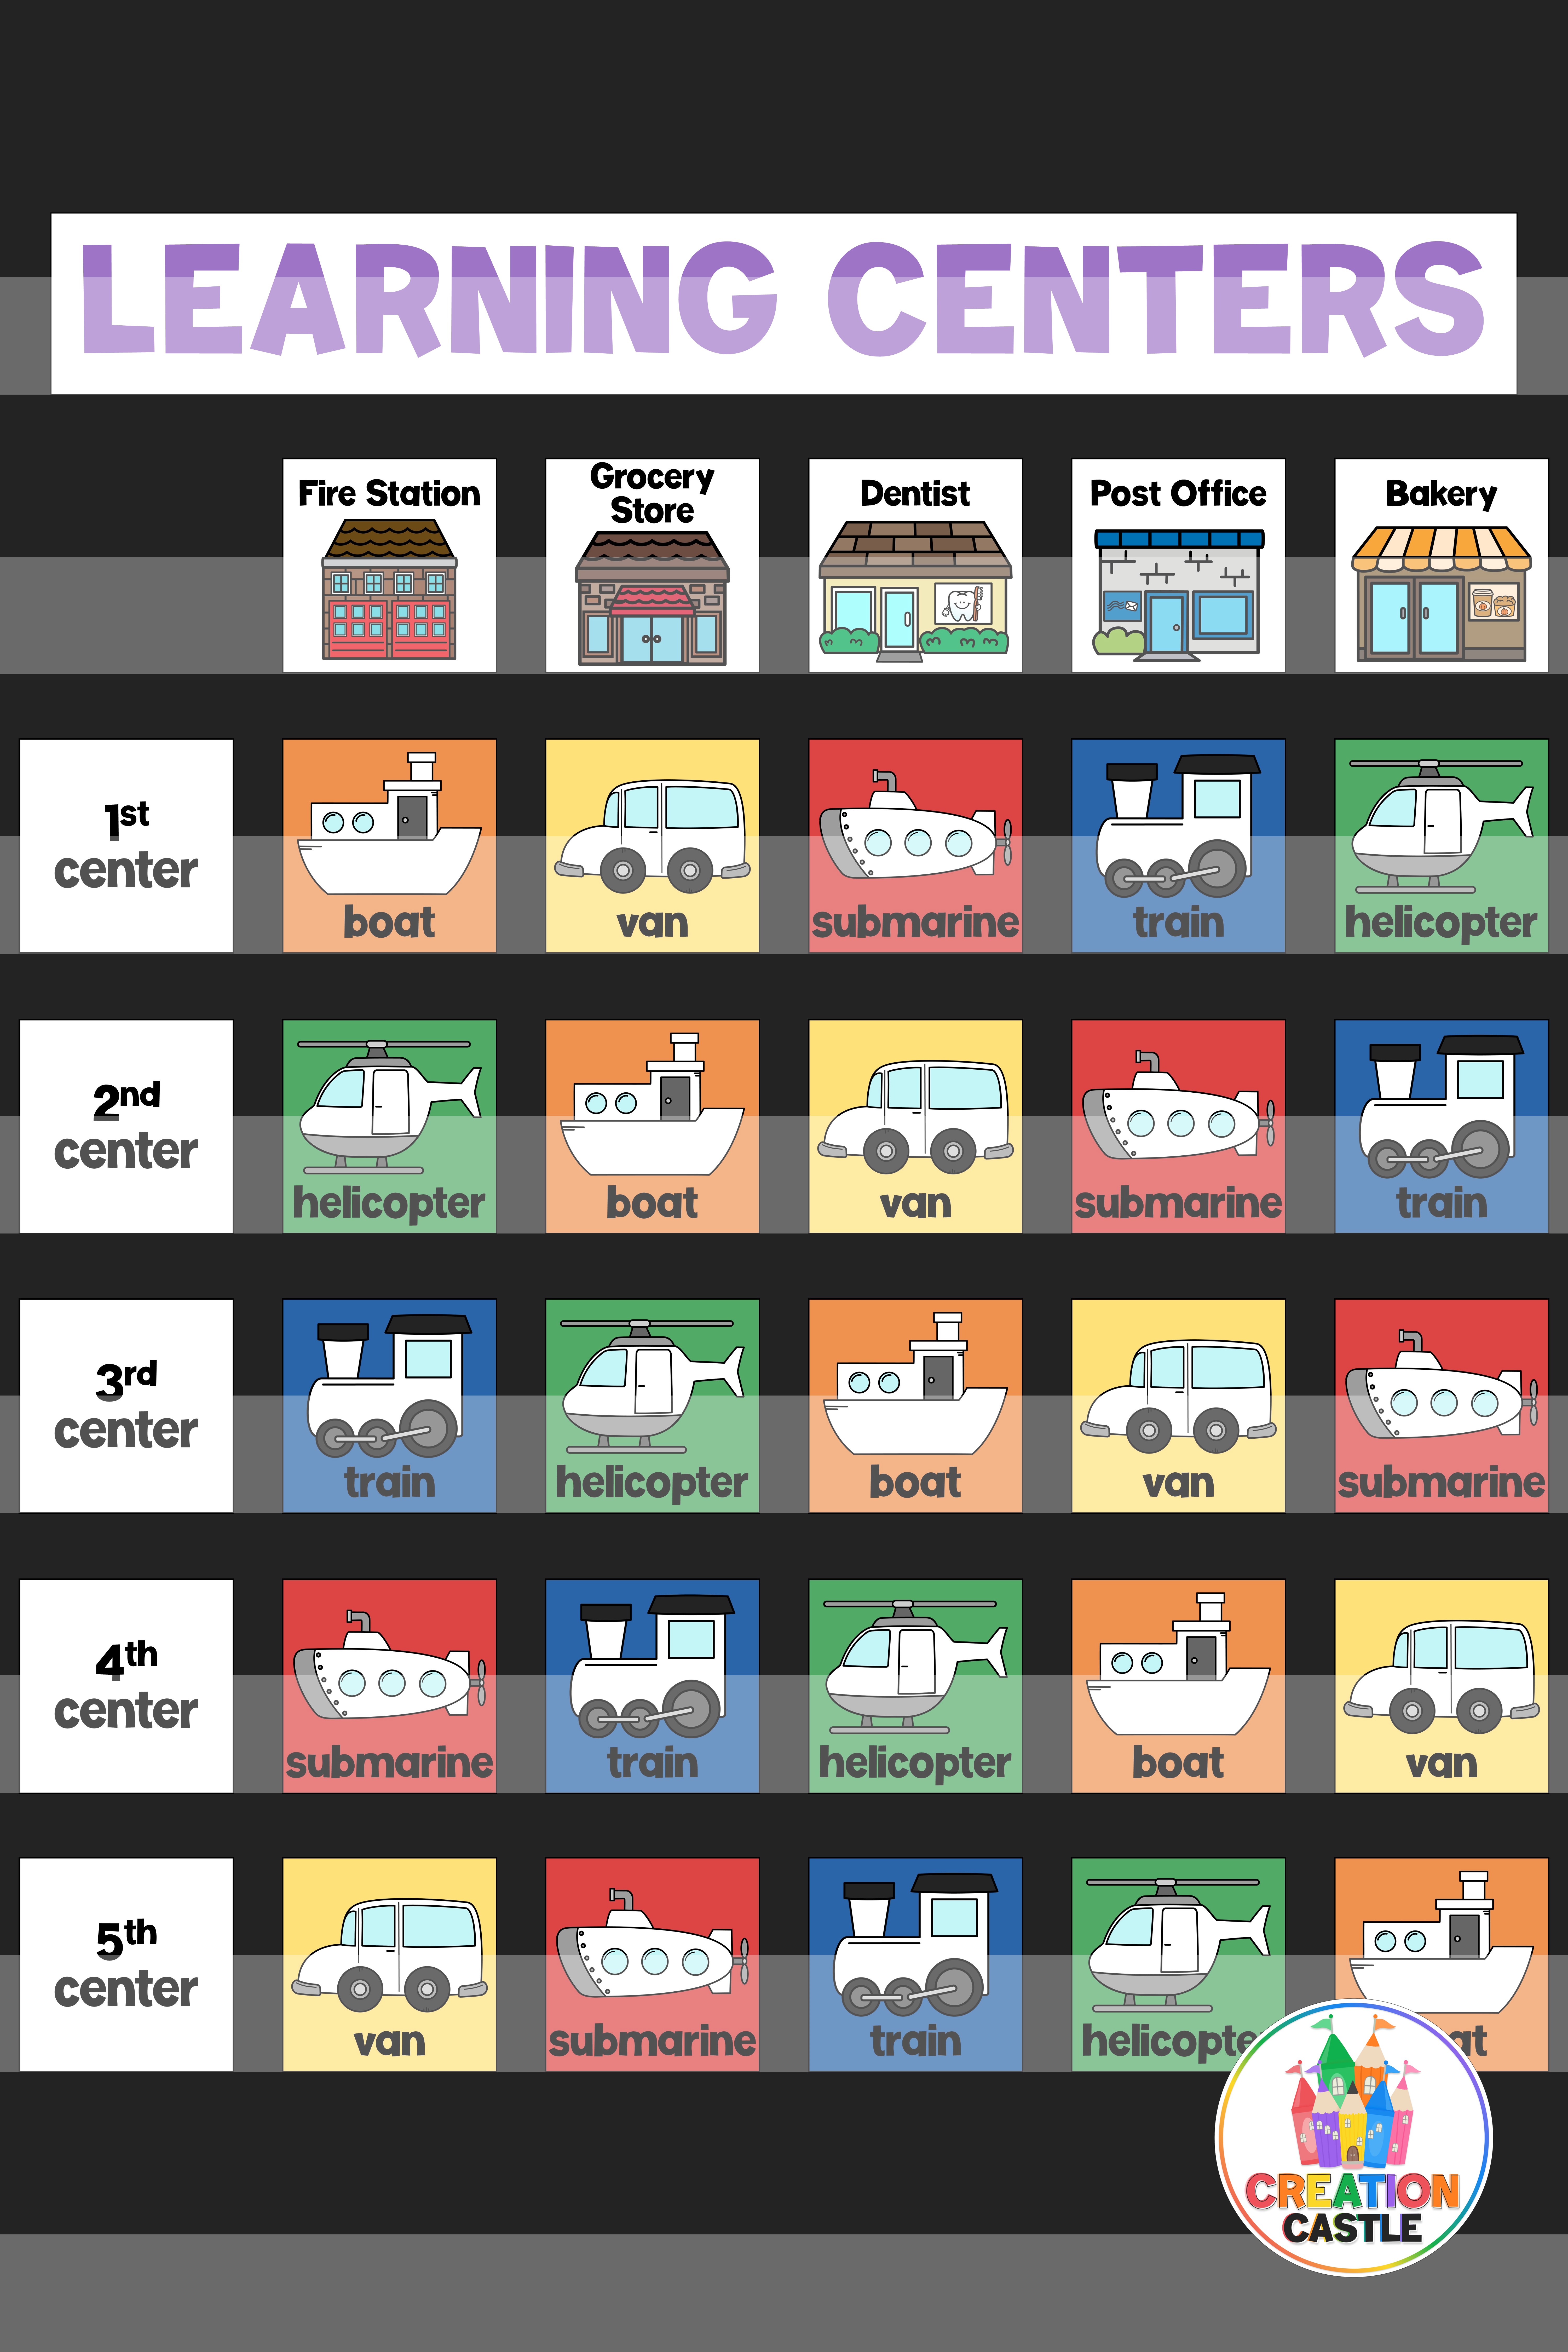
Let’s take a look at Emily and Ursula in this example.
Emily is the orange group and the boat group. In this example she would follow the orange cards for both her center times (math and literacy).
Ursula is in the orange group and the van group. So, during literacy centers (color groups), Ursula would follow the orange cards. First she would go the the fire station, then she would go to the grocery store, etc. However for her math centers (vehicle groups), she will follow the van cards. Although these cards are yellow, the color is irrelevant when she is with her vehicle group. So she would begin at the grocery store, then go to the dentist, etc.
Option 4
The most complicated of chart options would include all your math and literacy rotations on the same chart. This setup would probably be tricky for your students, but it might be a good way for YOU to keep track of the weekly rotations. You might consider using this method on a piece of paper to keep at your small group table just to track where everyone should be.
With this version, during math centers (vehicles), students would track their location horizontally. During literacy centers (colors), they would follow the chart vertically.
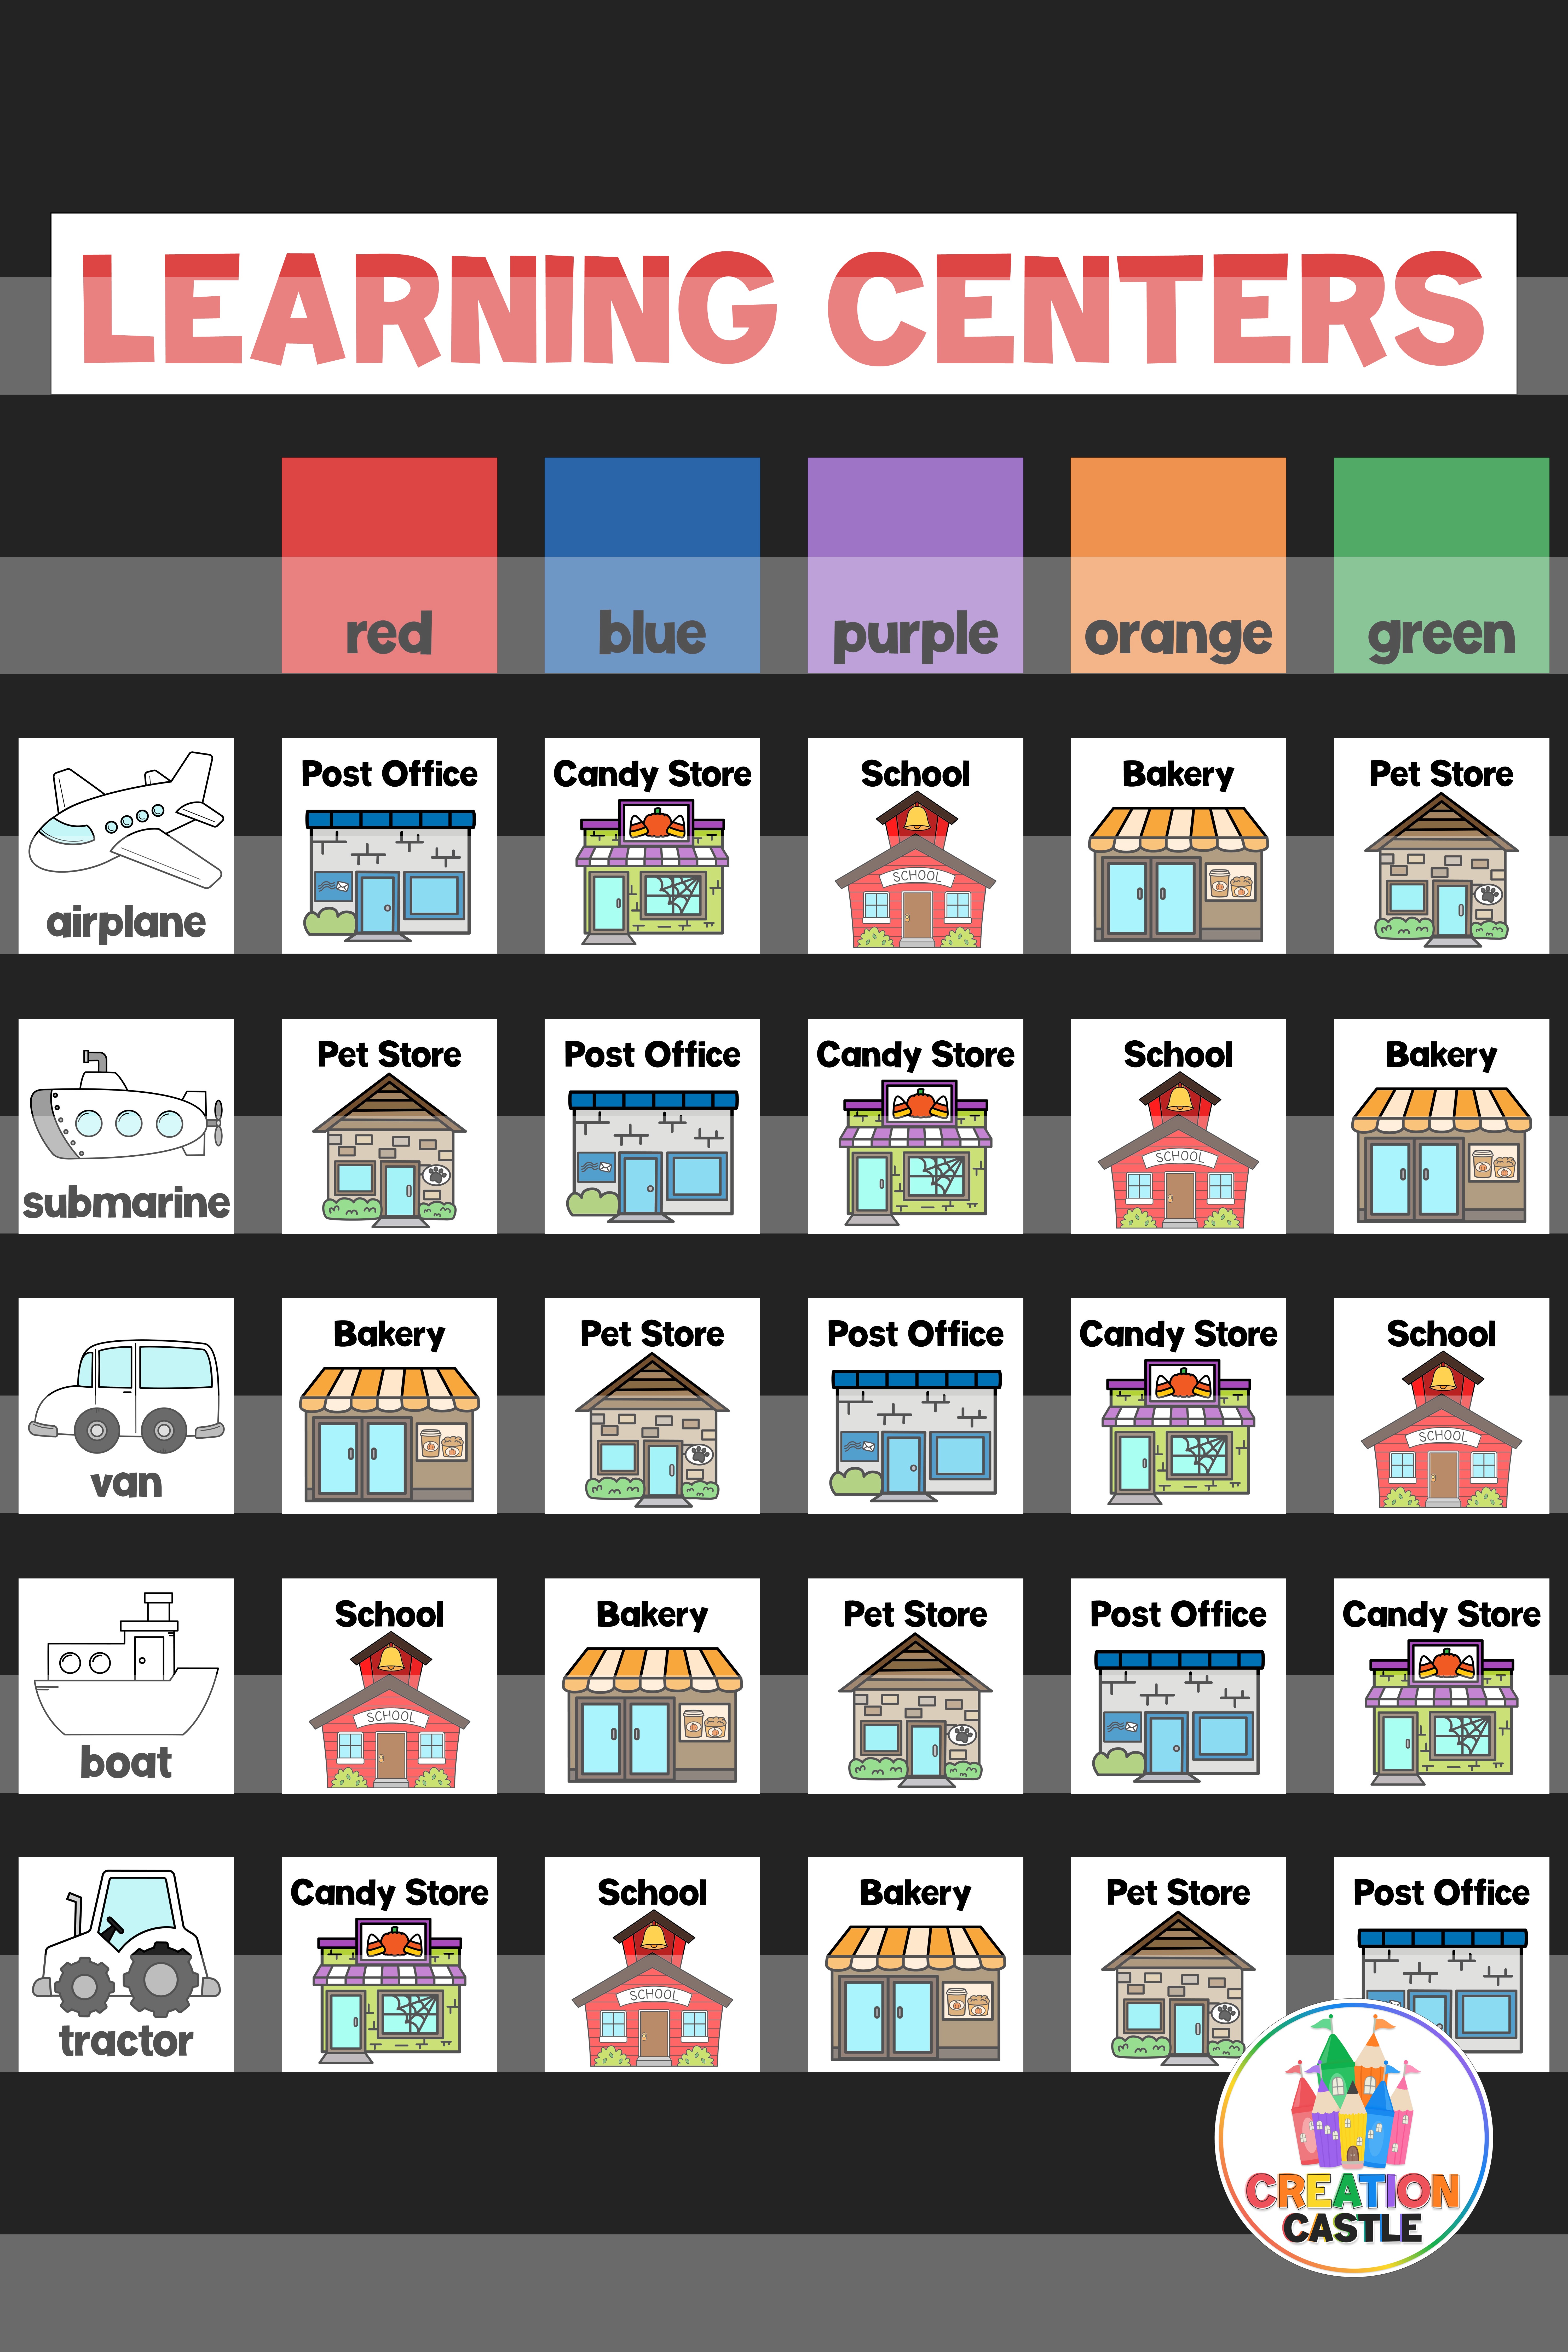
For example, if Rachel is a red tractor…
Her math centers would be as follows:
1st: Candy Store
2nd: School
3rd: Bakery
4th: Pet Store
5th: Post Office
Her literacy centers would be as follows:
1st: Post Office
2nd: Candy Store
3rd: School
4th: Bakery
5th: Pet Store
If you were to try this with students, I think it would be easiest to cover up the rows or columns that do not apply to the current rotation. So if you are doing your first round of math centers (vehicles), I would flip over the color cards at the top of the chart and cover the 2nd-5th columns. Then students would only need to track their vehicle and the corresponding center location.
Your Turn to Create a Center Rotation Chart
Hopefully, the visuals above helped you decide which way you want to use the chart. Enter your email address in the box below to get access to a Google Drive folder with all the pieces to make your chart. Be sure to check the folder from time to time to see when new locations are added (I’ll remind you in an email too!)

Creation Castle
Heather is the author of Creation Castle. She has experience with general education, special education, and ESL students in kindergarten through fifth grade. She specializes in early elementary math and literacy, as well as organization.

